If you’re using Hubspot for your live chat widget (or have a chatbot running), you might be interested in seeing those enquiries pull through as conversions into Google Ads. Fortunately, it’s quite easy to set up tracking for Hubspot chat sessions using Google Tag Manager in just a few steps.
What You Will Need:
You will need edit access to Google analytics and publish access in Google Tag Manager. You will also need a Hubspot chat flow setup on the website (live chat or chatbot both work with these instructions).
- Google Analytics
- Google Tag Manager
- Hubspot Chat on your website
Summary Of Steps
- Create Event Variables
- Create a custom HTML tag for the chat listener
- Create a GTM trigger that fires on Hubspot chat engagement
- Create the Google Ads event in Tag Manager
Step 1: Create event variables
In this step, we will create 3 new Data layer variables.
- Go to variables in your GTM container
- Under ‘User-Defined Variables’ click ‘New’
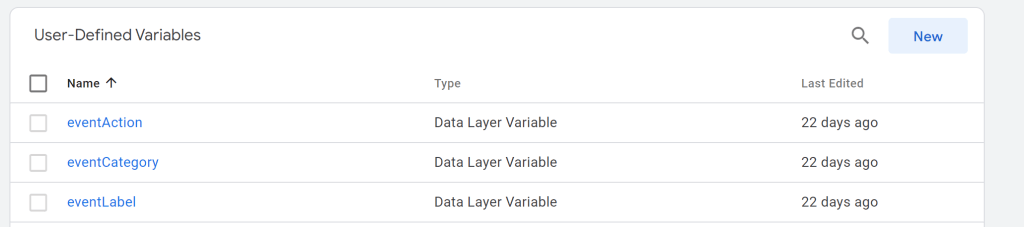
- Select ‘Data Layer Variable’ > Name it eventCategory > under ‘Data Layer Variable Name’ enter eventCategory > Save
- Select ‘Data Layer Variable’ > Name it eventAction > under ‘Data Layer Variable Name’ enter eventAction > Save
- Select ‘Data Layer Variable’ > Name it eventLabel > under ‘Data Layer Variable Name’ enter eventLabel > Save
It should now look like this:
Step 2: Create a custom HTML tag for the chat listener
- Create a new tag in GTM and name it HS Live Chat Listener
- Under Tag Configuration, select Custom HTML
- Paste the code below
- Set the trigger to fire on all pages
- Save your tag
<script> function onConversationsAPIReady() { window.HubSpotConversations.on(‘contactAssociated’, function(payload) { window.dataLayer.push({ ‘event’: ‘ga_event’, ‘eventCategory’: ‘hubspot-chat’, ‘eventAction’: ‘contact associated’, ‘eventLabel’: ” }) }); window.HubSpotConversations.on(‘conversationStarted’, function(payload) { window.dataLayer.push({ ‘event’: ‘ga_event’, ‘eventCategory’: ‘hubspot-chat’, ‘eventAction’: ‘conversation started’, ‘eventLabel’: payload.conversation.conversationId }) }); } if (window.HubSpotConversations) { onConversationsAPIReady(); } else { window.hsConversationsOnReady = [onConversationsAPIReady]; } </script>
Your tag should look like this:

Step 3: Create a trigger in GTM to fire on chat engagement
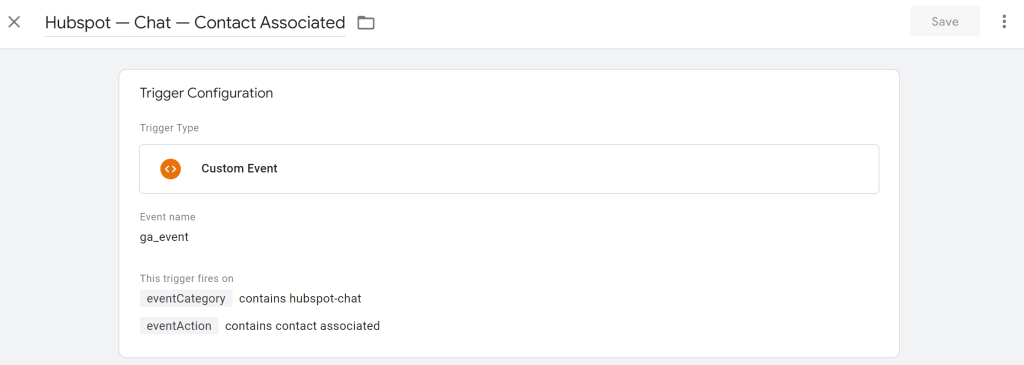
- Create a new Trigger in Google Tag Manager and name it Hubspot — Chat — Contact Associated
- Under Trigger Type, select ‘Custom Event’
- In the Event Name field, enter: ga_event
- Under ‘This trigger fires on’, select ‘Some Custom Events’
- Select eventCategory from the dropdown > select contains > enter: hubspot-chat
- Click the plus sign to add an extra condition
- Select eventAction from the dropdown > select contains > enter: contact associated
Your trigger in GTM should look like this:
Step 4: Setup a tag for the Google Ads conversion tracking
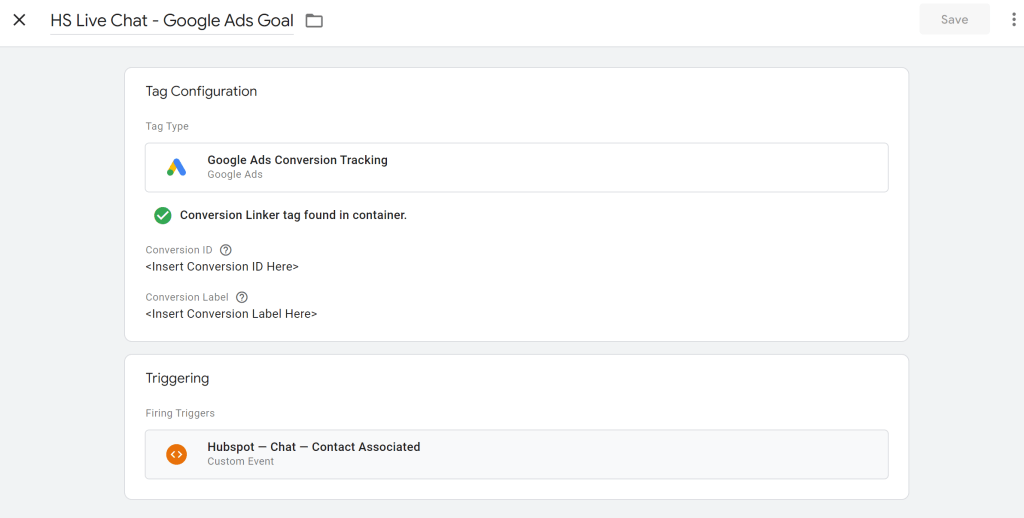
- Go to tags > new > Google Ads Conversion Tracking
- Enter your Conversion ID & Conversion Label (through setting up a conversion in Google Ads)
- Under ‘Triggering’ add the Hubspot — Chat — Contact Associated trigger we created in the last step
- Click Save
Here is what your Google Ads tag should look like:
That should be all of your steps complete. Now you just need to wait for a user to interact with your Hubspot Live Chat in order for it to fire a conversion in Google Ads. If you are familiar with Google Tag Manager, you can easily set up something identical if you wish to fire events into Google Analytics. You’ll just need to swap to a Google Analytics Event tag in step 4 and configure accordingly. If you get stuck or have any questions, feel free to reach out.